Login | Register Cart (0)

Gluten-free, Sugar-free Raspberry Muffins

By Healthy Planet Blog Nutrition and Natural Health
on November 29, 2012
5 comments

RASPBERRY GLUTEN-FREE SUGAR-FREE MUFFINS:


We’ve been experimenting with quite a few sugar free, gluten-free, yeast-free breads and desserts. We have had some victories and a few disappointments, but I wanted to share them with you. This is an adaptation to our Blueberry Muffin recipe posted last week – see here. For anyone with yeast overgrowth or even just some yeast issues, these will help starve that yeast and get it eliminated from your body. Often times we don’t even realize we have yeast and the possibility that they might have taken control of our intestinal flora. Do you have lots of bloating after eating? Probably yeast. Can’t lose weight even though you’re starving yourself? Probably yeast. We have to starve it by eliminating ALL sugar and yeast from our diets. Other things need to be eliminated too, but these are the main culprits. To say it's difficult to find a sugar-free, gluten-free, and YEAST-free bread is an understatement. Let me know if you do. We've experimented with a few recipes and found some we really liked. I will be posting those recipes very soon.

Now, just a short note about these recipes. They are adapted from a book called "The Joy of Gluten-free, Sugar-free Baking" and I highly recommend the book. However, I suddenly realized with my last two recipe attempts, the authors are WEIGHING their dry ingredients. For instance, one recipe says 1 cup (4 oz/113 grams)! Well, I've been baking since I was a kid and one cup to me is 8 ounces in a dry measuring cup - so totally NOT 4 oz! So I decided to actually weigh the flour this time at 85 grams and I think they turned out better than the last batch. Which, really if you think about it, each "flour" has a different weight - it's a bit different than using all purpose flour which stays the same. The almond flour I purchased and is available in most grocery stores, but for the pecan flour, I simply ground up raw organic pecans in the spice grinder. And seriously? If you don't have yeast issues or aren't worried about the glycemic load, you could use sugar in these recipes. Hmmm - and did you notice? There are NO oils or fats added? The fats are naturally derived from the nuts - and they are the healthy fats!

Ingredients:

¾ cups (3 oz/85 grams) pecan flour
¾ cup (3 oz/85 grams almond flour
½ cup Stevia in the Raw Extract (we were able to find this at Russ's! One of our least health-oriented grocery stores.)
1/3 cup hemp seeds
1/3 cup organic dried coconut
1 tablespoon baking powder
¼ teaspoon salt
2 eggs (approximately 3.5 oz/99 grams)
½ cup (4 oz/113 grams) unsweetened coconut milk
1 ½ teaspoon vanilla extract
1 tsp fresh lemon juice
1 packet NuStevia
½ to 1 cup fresh or frozen raspberries (I put them in still frozen)

Preheat your oven to 350 degrees F. Line 9 to 10 muffin cups with paper liners. I like to spray them with olive oil spray (optional). Mix the pecan flour, almond flour, Stevia in the Raw, hemp seeds, coconut, baking powder and salt until well blended. In a separate bowl whisk the eggs, milk, vanilla, lemon juice, and NuStevia until well blended.  Add the egg mixture to the bowl with the flour mixture and stir with a large spoon for 1 to 2 minutes. I’ve found that this is an important step to get the correct consistency of the batter. I even set my timer for 2 minutes after I pour the egg mixture into the flour mixture but I’m a little OCD-ish. Fold the raspberries into the batter – gently of course. Again, no need to thaw them out first - easy and fast.

Spoon the batter into the muffin cups and the cups should be just about full. They don’t rise much if at all.  Place the muffin pan on a cookie sheet and place in the preheated oven. Bake for 20 minutes, then rotate the pan and bake for another 15 to 20 minutes. Test them with a toothpick and if it comes out clean, they’re ready. I like to then set them out on a wire rack for cooling. Well, truthfully, I like to pull a really hot one out and slather it with butter and eat it right then - my reward.

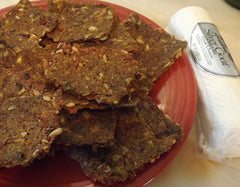
We liked these a lot and Warren took a few to work with him today.  I will do a nutritional analysis, but just knowing that I’m using nut “flour” (and we use organic raw nuts), NO sugar, and coconut milk – the amount of fiber and protein has to be high. The raspberries of course were not sweetened – so more goodness for you.

Let me know if you try these and how they turned out. If you have any questions, let me know!

Thanks for listening!

Ann McIntire Wooledge, RN, CCAP

Easier Veggie Flax Seed Crackers

By Healthy Planet Blog Nutrition and Natural Health
on July 20, 2012

Easier Veggie Flax Seed Crackers


Our favorite morning "energy" juicing recipe is just a matter of throwing in a few beets, carrots, celery stalks, and sometimes a low-sugar apple such as Granny Smith. We add 1/2 half of a raw lemon sometimes. I recently made our juice for the morning - without the apple - and looked at the stack of pulp that was left. We often just stir that into the dog's food dishes and they surprisingly really like it. For some reason that morning I started considering how I could use that pulp in some raw flax seed crackers. I decided to add ground flax seed, whole flax seed, some fresh minced garlic and some fresh chopped onions, plus some seasoning. By "raw", I mean using the dehydrator at around 105 to 110 degrees rather than baking them. I ended up doing both - one batch dehydrated and one batch baked at 350 degrees for about 2 hours. 

Following those successful batches, I then decided rather than juicing the vegetables why not just put them through the food processor. So I did just that and added walnuts and sunflower seeds - a good choice and certainly enhanced the flavor and feel of the cracker. I baked half and dehydrated half. The nutrition is obviously higher in the dehydrated ones, but I do like the instant gratification (well 2 hours) over the 10 to 12 hours in the dehydrator. Very satisfying for us since we haven't had any bread or cracker products in quite some time.

For the last batch, I did use the food processor and for some reason baking them at 350 degrees for one hour ended up burning a large outside portion of the batch - big bummer. (See important note below - after subsequent batches, I found that 250 degrees worked much better. Bake 1 hour, score and turn the crackers over and bake for another 30 to 45 minutes until crispy.) I had put half of the batch in the dehydrator so we at least had those. I should have checked them rather than just setting the timer for one hour, but was busy outside. Lessons learned. I do suggest that since different combinations of vegetables can certainly be substituted as some people aren't as fond of beets as we are, or onions, that you blend the mixture, add the flax seeds, nuts, sunflower seeds and just enough oil to make it possible to spread onto a baking sheet or dehydrator sheet. I suppose if I were industrious enough I would do a You Tube video of this and perhaps will.

HOW TO BAKE FLAX SEED CRACKERS:

The first time I made them into cookie-sized rounds and smashed them down to about 1/2 inch. The next time I realized how wasteful of space this was and remembered some of my raw food cook books where they simply spread the entire batch over the entire baking sheet pressing it until it reaches the edges and assuring about 1/4 inch thickness. For the other ones, I did the same thing. On both I used the paraflex nonstick sheets. After one hour (or until the crackers feel done on one side), I scored them into cracker sizes with a sharp knife and turned them over on the dehydrator tray without the nonstick sheet to allow for additional drying. I turned the crackers over on the baked ones but left the nonstick sheet in the baking sheet. 

 
Yummy spread with soft goat cheese.

How long do I bake them?:

For the first batch, the one hour on one side and another hour on the 2nd side worked great in a 350 degree oven. (See note below - changed my recommendation to 250 degrees.)  I absolutely do not know why the last batch burned! The dehydrated ones, I dehydrated on one side for 4 hours, turned them over and dehydrated until they felt like crackers should - crunchy. Others may like them chewier, so this will require less time. 

INGREDIENTS: (organic where possible)

2 medium beets, peeled and cut into smaller pieces, the size depending on your food processor or juicer
1 medium onion, peeled and cut into smaller pieces, ditto above
5 stalks of medium sized celery, ditto above
5 medium sized carrots, peeled if using the food process, just scrubbed if using the juicer
1/2 of a medium red bell pepper
2/3 cups crushed flax seed (best to crush the whole seeds freshly each time in a coffee/herb grinder)
1/2 cup whole flax seeds
1/3 cup olive oil - or just enough to make the mixture stick together in order to spread
2 Tbsp Westporte Special Seasoning (or use your favorite all purpose seasoning)
5 to 6 twists of garlic salt seasoning
2 to 5 cloves of fresh garlic, minced
1/3 cup chopped raw organic walnuts
2/3 cups raw organic sunflower seeds

If you are from my generation, you might remember when Chef Boyardee came out with the pizza kits and our favorite things to do would be have pizza parties where we handmade the pizza's and added the toppings. Everything came in the box - you mixed the yeast with the dough and spread it evening onto a baking sheet. The point here is the same gently pressing and spreading the dough onto the sheet is much the same way I spread the cracker recipe over the entire baking sheets - evenly as possible and about 1/4 inch thick.

 For baking use 350 degree preheated oven (see note below) - and watch carefully for the 1st hour to make sure you don't make the same mistake I did. Score them into the size crackers you want and turn them over to bake for about another hour - or less. For the dehydrator ones, spread them onto the paraflex nonstick sheets for 4 hours. Test to see if they are ready to turn. If they are still too moist, dehydrate for another 2 hours. Test again and when ready, score them and turn them over onto a tray without the nonstick sheet. Dehydrate for about another 4 hours, testing as you go.

This is not nearly as complicated as it sounds! After your first batch you can tweak it as you would like, or be adventurous and tweak it from the start.

Note added: July 23, 2012: I made another batch today and changed the oven to 250 degrees. I watched them every 30 minutes and it took a little over an hour to bake the first side. I scored them and turned them over and they looked and tasted much better than the 350 degree oven batch. 

Follow this link to other ways to use the pulp leftover from juicing. Would really like to hear about your juicing recipes and any crackers that you make.

Thanks for listening!


Healthy Homemade Chai-Spiced Tea

By Healthy Planet Blog Nutrition and Natural Health
on March 11, 2012

Healthy Homemade Chai-Spiced Tea:


I've tried so many different chai tea recipes using the regular powdered spices or buying a mix of some sort - nothing tastes like I think it should. That is until I found this recipe where it's made from scratch. Luckily I already had all of these spices as a whole spice because I wanted to try more Indian dishes and have found that spices are so much better when crushed by hand just before adding them to a dish. It's really not difficult - of course a little more time-consuming than just putting a mix in a cup and microwaving it. I made enough so that I can drink 2 cups for 2 days. So, in the long run, it is less time actually. I like it warm, almost hot. It's also very good for you. You can use black tea, green tea, or rooibos (good recommendation) tea - whichever you have or like best. Any "milk" product would work as well. I used non GMO soy milk because I needed a little more protein that day, but any of the nut milks would work great. This is also a great coffee substitute if you're trying to cut down on caffeine.

Chai Spiced Tea:

1 cinnamon stick
8 whole green cardamom pods
8 whole cloves
1 teaspoon dried ginger root (not powder) OR 1-inch piece fresh ginger root, peeled and thinly slice
4 whole black peppercorns
1 tsp vanilla extract or 1 inch of a vanilla bean
2 1/2 cups filtered water
2 single-serve black tea bags or 1 Tbsp of whichever loose tea you prefer
2 Tablespoons unrefined sugar (I really like the turbinado, but usually use stevia)
1 1/2 cups milk (non-GMO soy or nut milk)

Place cinnamon, cardamom, cloves, ginger, peppercorns, vanilla bean or extract in a 1.5 to 2-quart saucepan. 

Add filtered water and bring to a boil. Reduce heat, cover, and simmer for 5 minutes.

Remove from heat, set aside, and let steep for 10 minutes.

Return pot to the heat and bring to a boil. Remove from heat, add tea, cover and set aside to let steep for 3 to 5 minutes.

Strain mixture through a fine mesh sieve, discarding solids. 

Return liquid to the pot and stir in sugar (or stevia*) and milk.

Heat over low heat for 2 to 3 minutes or until warmed to your liking. Pour into cups and serve. (Also good over ice.) I left the spices in the glass that I stored the tea in (refrigerated it) until I wanted my next cup. By leaving the spice mixture in the leftovers, it made it taste (I do like it sort of strong) even better each time I reheated it.


Serves 2-large mugs or 4-small mugs.

Adapted from one of favorite resources - this is a great website.
http://www.cookinggodsway.com/author/Shannon/

Let me know if you try it, or if you have your own recipe that you like.

Thanks for listening!


Cart Summary

Your cart is empty

Blissful Baby

  • Blissful Babies Boo Boo Bottom Balm - 99% certified organic ingredients
    Blissful Babies Boo Boo Bottom Balm - 99% certified organic ingredients
  • Blissful Babies Calendula & Chamomile Organic Bar Soap
    organic baby soap infused with certified organic calendula, chamomile and helichrysum flowers with certified organic oils and shea butter
    Blissful Babies Calendula & Chamomile Organic Bar Soap
  • Blissful Babies Lavender & Chamomile Organic Bar Soap
    organic shea butter  bar soap infused with organic lavender and chamomile essential oils and flower powder
    organic shea butter bar soap with organic essential oil of Bulgarian lavender and Roman chamomile, infused with certified organic lavender flowers and certified organic chamomile flowers, handmade, cold processed, all natural
  • Blissful Babies Lavender and Chamomile Body Cream
    organic baby cream with essential oils of true Bulgarian lavender and roman chamomile
  • Blissful Babies Lavender Body Cream
    true high altitude Bulgarian lavender in an organic body cream for babies
  • Blissful Babies Lavender Body Powder
    Blissful Babies Lavender Body Powder
    Blissful Babies Lavender Body Powder

Gluten-Free Products Clearly Identified

With an alarming increase in gluten intolerance and allergies, we feel identifying this on our skin and body products is important. If you are in...

Read more →

From the Blog

Simple Habits to Protect Your Eyesight

September 04, 2017

DID YOU KNOW?! "Orange (as in carrots) isn’t the only color that helps support the eyes; eating a variety of...

Read more →

10 BEST CANCER KILLING PHYTONUTRIENTS

September 04, 2017

DID YOU KNOW!?  You will often see me mention cancer "cures" - yes, it can be cured and you certainly...

Read more →

GINGER FOR MIGRAINES!

September 04, 2017

DID YOU  KNOW!?  Ginger as Effective as Synthetic Drug in Migraine, but Without the Side Effects! I love ginger, both...

Read more →